Learn to Make Custom Silicone Purge Dams with Your Branding
Hello, fellow welders!
I’ve been waiting for the perfect moment to introduce a high-quality two-component silicone that lets us create professional TIG purge kit ourselves. That moment has finally arrived! And, as with many of our welding adventures, we’ve struck gold—just like that time when the NDT inspector approved an entire project without ever stepping foot on-site!
Why This Silicone is a Game-Changer
This high-quality platinum-cured silicone offers multiple advantages that make it a must-have for professional welders:
Key Benefits:
1. Cost Efficiency
A DN80 purge dams costs only €1.50 in materials and takes two hours to make. In that time, you can produce five purge dams, maximizing both savings and efficiency.
2. Fast Curing
The silicone fully cures in just 24 hours, making it incredibly practical for daily welding tasks.
3. Heat Resistance
Withstands temperatures up to 300°C (572°F) during short-term contact—ideal for industrial applications.
4. Food-Grade Quality
Safe for use in pharmaceutical applications, adding even more versatility.
5. Easy-to-Use 3D Mold
Download a ready-made mold file, adjust the size as needed, and you’re good to go—courtesy of pipeweld.ee.
6. Custom Branding
Add your logo or branding to create professional-looking TIG purge dams tailored to your business.
My Experience with Purge Tool Making & Tips for Success
I’ve personally tested this entire process and am excited to share everything I’ve learned. All I ask in return? Repost this article in relevant welding forums and check out the other DIY tools we’ve developed here on the blog!
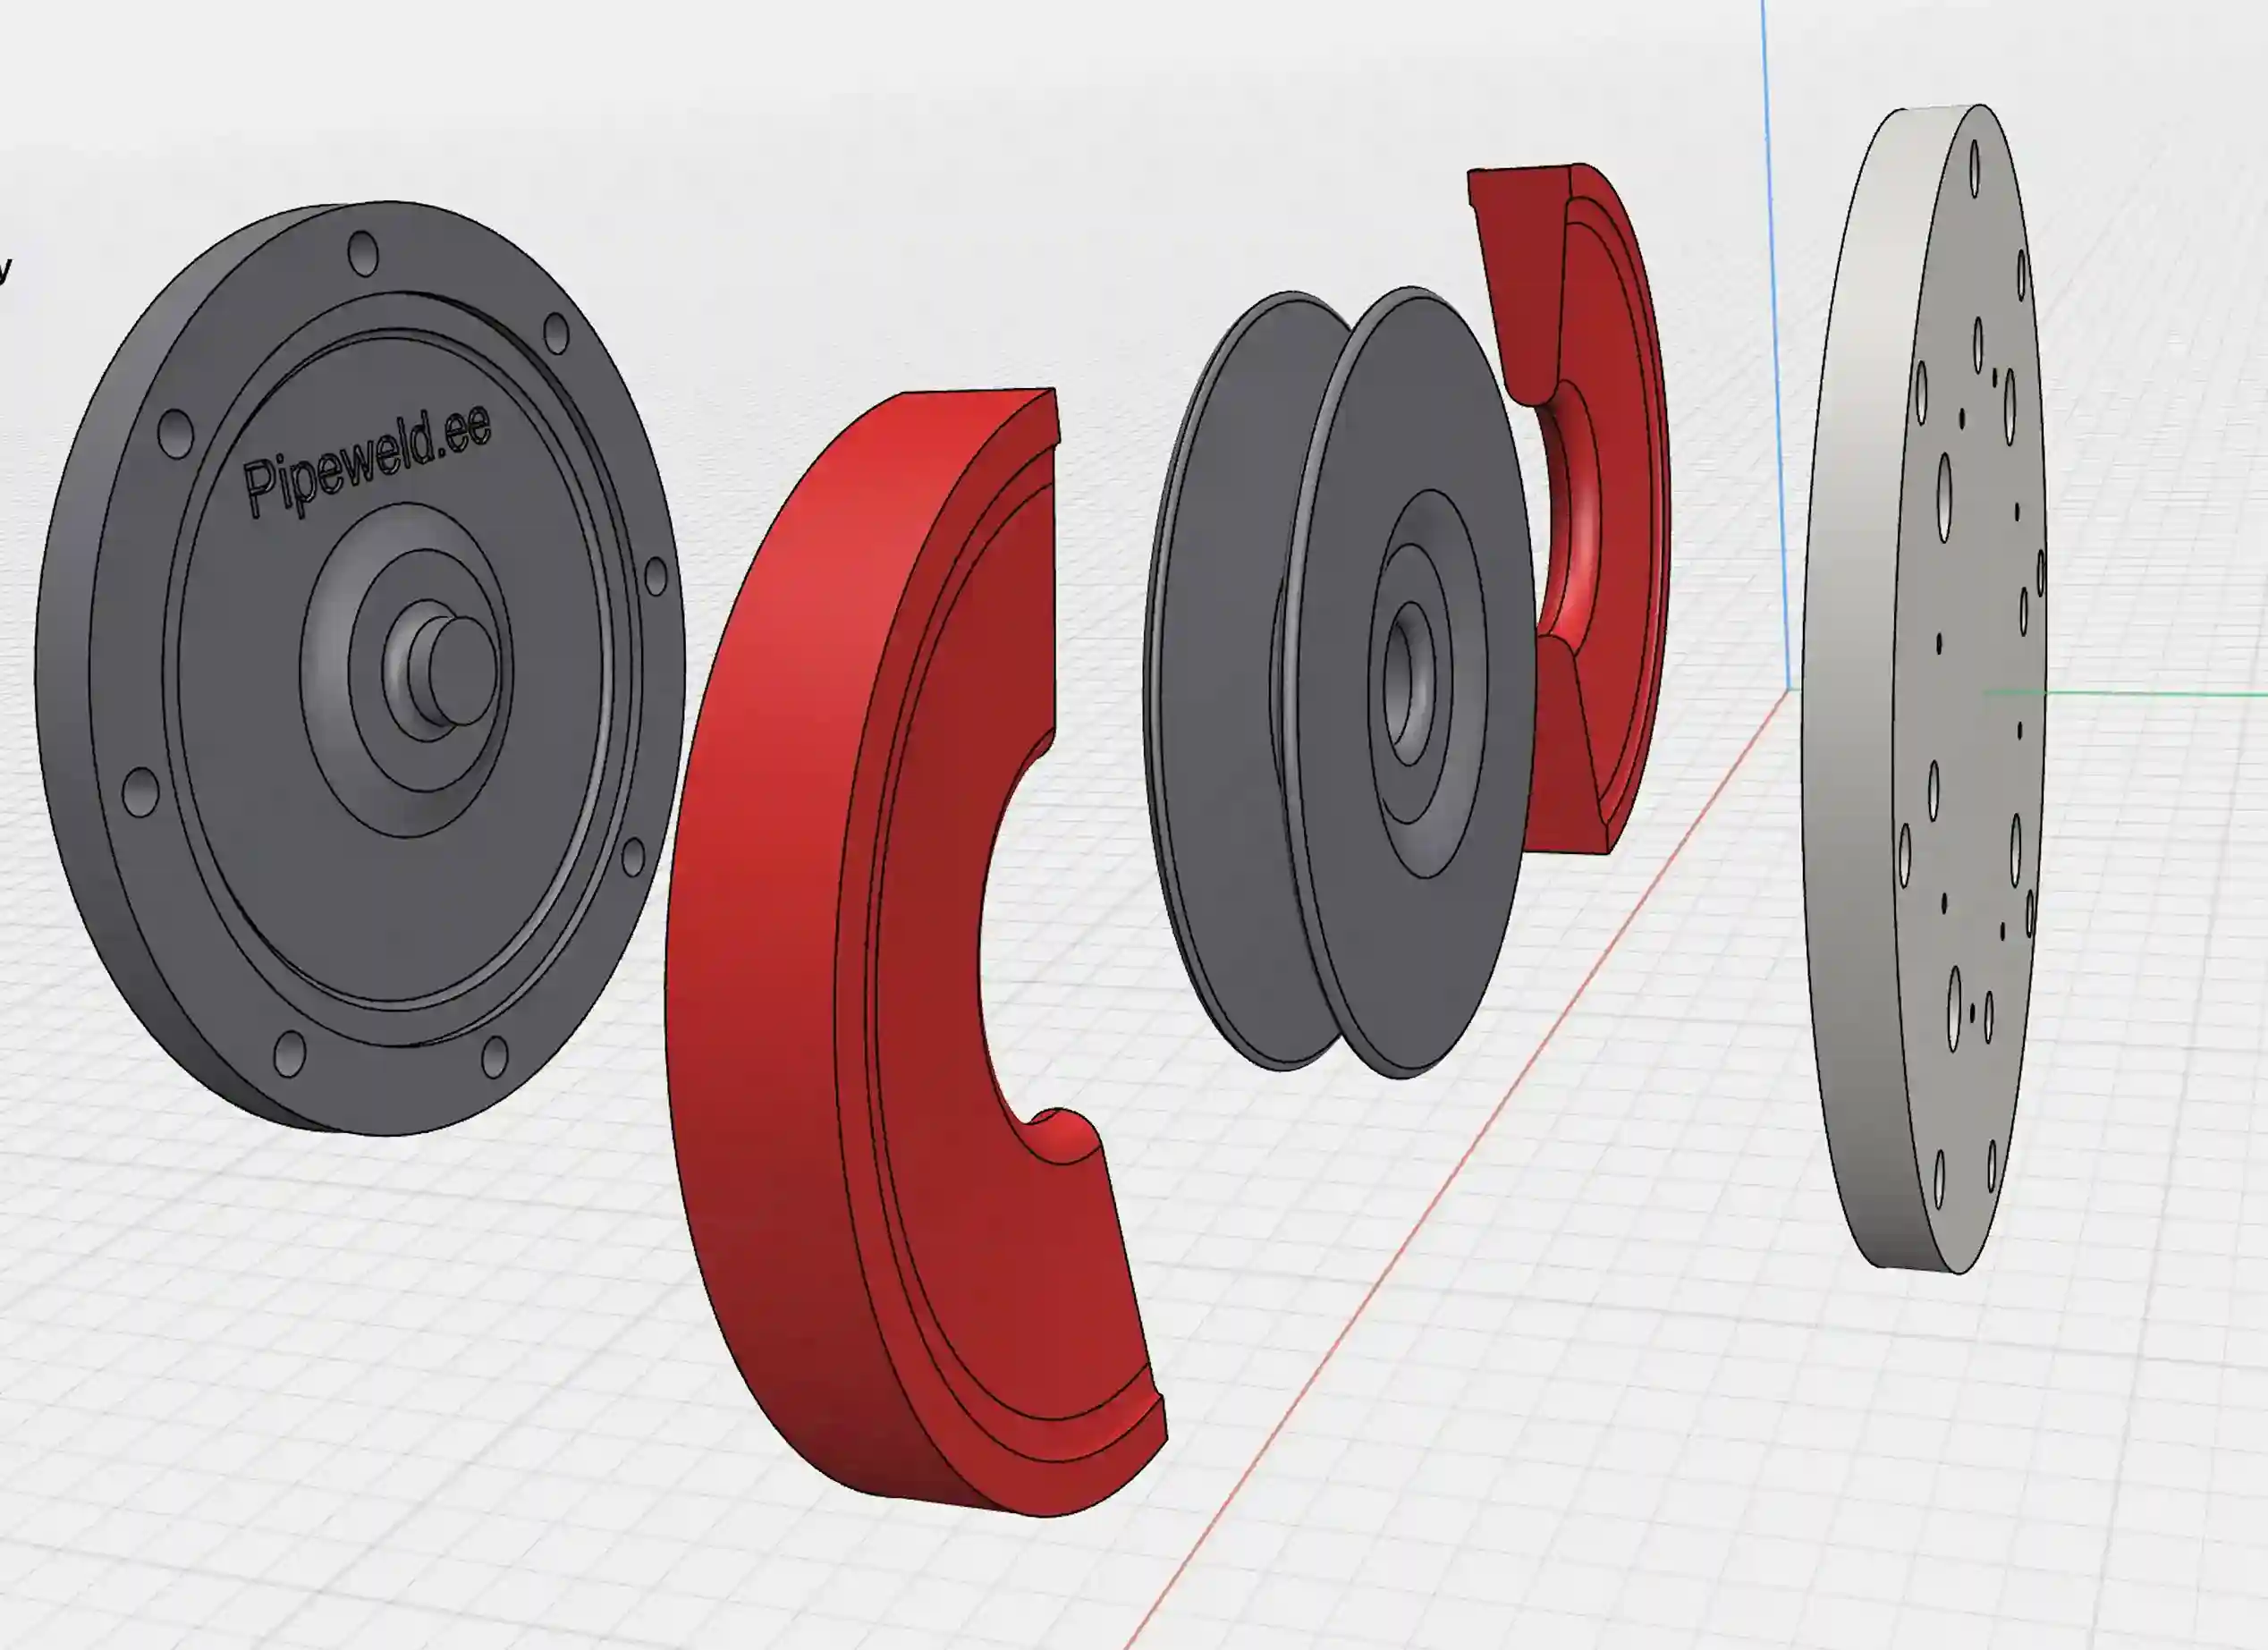
3D Mold for a Purge dums : STL and STEP Models
This tested and proven 3D model is available in STEP format and consists of four parts. The base mold is designed for a purge tool with an OD of 94 mm, making it perfect for DN80 pipes.
Need a Larger Size?
Scaling up is easy! If you need a purge dam for DN150 (OD 169 mm) or any other size, simply adjust the model’s dimensions using Cura or any other slicer program before 3D printing. Most slicers allow you to scale objects along all three axes.
➡ Download the STEP format 3D mold model here
Scaling Example:
• To increase the 94 mm model to 152 mm, scale it by 61.7%
• For a 212 mm diameter, scale it by 39.7%
• Adjust all three axes proportionally for precise results
New 3D Model: Purge Plug with a 1 mm Metal Plate
📅 Updated: February 2025
After multiple requests, I’ve designed a larger purge plug model with a 1 mm thick metal plate. These types of plugs are widely used in industrial welding, so you’ve likely come across them before.
Where to Use It?
This model is best suited for pipes with diameters between DN200 and DN400.
What Makes This Design Special?
• The 280 mm diameter is based on an existing industrial purge plug, ensuring accurate proportions.
• A dedicated groove on one side makes it easier to install the metal plate in the center, improving stability and functionality.
➡ Download the Purge plug
Choosing the Right Silicone for TIG Purge Kits
For the best results, I strongly recommend platinum-cured silicone due to its durability, sterility, and ease of use.
Key Factors to Consider:
• Ideal Hardness: After extensive testing, I’ve found that a Shore hardness of 40-60 works best. Anything softer, like Shore 20, is too flexible for industrial applications.
• Accurate Mixing: Use a digital scale with at least 1-2 gram precision to ensure the perfect mix of the two silicone components.
Pouring and Curing the Silicone
1️⃣ Mixing & Mold Setup
• Stir the silicone thoroughly for at least 5 minutes to achieve a consistent mixture.
• Assemble the 3D-printed mold and secure it with bolts.
2️⃣ Bubble-Free Curing (Optional)
• If available, place the mixed silicone in a vacuum chamber to eliminate air pockets.
• No vacuum chamber? Use self-degassing silicone to avoid bubbles.
3️⃣ Precise Pouring Method
• Use a large medical syringe (100+ ml) for controlled pouring.
• For a DN80 purge dam, you’ll need 40 grams of silicone.
Removing Your DIY TIG Purge Tool
After 24 hours, carefully disassemble the mold and remove your newly formed purge dam. However, don’t use it immediately—let it sit for a couple of days to ensure the surface is fully cured and no longer tacky.
What You’ll Need for a Smooth Process & Great Results:
✅ 3D Printing – Find a place to print the model and have them scale it to your required diameters.
✅ Silicone Selection – Purchase platinum silicone with a Shore hardness of 50–60.
✅ Clamping Bolts – You’ll need 8 bolts for securing the mold. The diameter depends on scaling; for DN80, M5 bolts work best.
✅ 100 ml Syringe – Ideal for precise silicone pouring.
✅ Mixing Supplies – Get a measuring container and a mixing container for accurate preparation.
Pro Tip:
I’ve enlarged the silicone pouring holes to 9 mm in diameter—this makes the pouring process much smoother and ensures better curing quality.
A Small Favor – Share the Knowledge!
If you found this guide helpful, write a review, share this article, and try making your own purge plugs.
Good luck, colleagues! May your welds always be flawless!